Cloudflare APO is one of the easiest ways to reduce TTFB in multiple global locations and is easy to set up on WordPress.
When testing your site in KeyCDN’s performance test, you’ll probably notice how TTFB gets slower as your website is tested further away from the origin server. This is due to longer distances between your server and testing location/visitors. The solution is Cloudflare’s APO.
But doesn’t a CDN already do this?
Nope. Most if not all CDNs (including Cloudflare) don’t serve HTML from the CDN – but APO does. And since WordPress sites are dynamic, Cloudflare is able to serve your entire site from their edge network instead of only static content. While Cloudflare and Kinsta ran their own benchmarks, APO also made a big improvement for my own site which you can see in KeyCDN.
Setting up Cloudflare’s APO on WordPress is easy: once you’ve purchased APO, install the Cloudflare plugin, create an API token in your Cloudflare’s dashboard, and add it to the plugin. Of course, there are a few prerequisites and “small details” which I’ll be covering in this guide.
Here are a few helpful resources I used while writing this. I’ve already dug through these and included the recommendations, but feel free to read them yourself (there’s a lot of good stuff):
- APO instructions (by Cloudflare)
- APO misconceptions (by Brian Li at Kinsta)
- APO FAQs (answered by Cloudflare, published by Freelancer Tools)
If you plan on using Rocket.net’s Cloudflare Enterprise or FlyingProxy (both are great services), you don’t need to setup APO manually since it’s already built-in to the service.
- Benchmark TTFB in multiple locations
- Make sure your plugins are compatible
- Keep page caching enabled
- Confirm DNS records
- Change nameservers
- Activate Cloudflare’s CDN
- Purchase APO ($5/month)
- Install the Cloudflare WordPress plugin
- Create an API token and add it to the plugin
- Purge cache in your cache plugin, then Cloudflare
- Confirm APO is working
- APO vs. cache everything page rule
1. Benchmark TTFB In Multiple Locations
Tools like GTmetrix and PageSpeed Insights aren’t great for testing APO performance. That’s because they only test your site in 1 location. The whole point of APO is to cache HTML pages to Cloudflare’s worldwide data centers, which means you should see the biggest improvement in locations far away from the origin server. Sure, APO may be able to also improve core web vitals like LCP (and feel free to benchmark those too) – but those tests won’t give you the full picture.
That’s why I recommend a before & after test in KeyCDN which measures TTFB and other metrics in 10 global locations. Make sure you test your website before and after APO. Just remember when it’s time to purge cache and retest, give it a minute to purge before retesting.
I got excellent results with APO in KeyCDN. My blog went from having only 2 green TTFBs to achieving green on all 10 TTFBs (I know, not an official test, but that’s what I got). Kinsta says APO “reduced load times from 70-300%” which doesn’t make sense and needs to be reworded.


2. Make Sure Your Plugins Are Compatible
If you’re using a cache plugin or some type of server cache
Cloudflare has a list of plugins compatible with APO, but it doesn’t include all of them.
FlyingPress, WP Rocket, and LiteSpeed Cache are all compatible with Cloudflare APO. WP Rocket says it’s not compatible on their website but I believe they just haven’t updated that page, since WP Rocket is clearly listed on Cloudflare’s website if you use version 3.8.6 or later.
3. Keep Page Caching Enabled
Page caching should be kept enabled when using APO.
Some hosts include built-in server caching while on other hosts, you would be using a cache plugin like WP Rocket, FlyingPress, etc. In either case, page caching should be kept enabled when using Cloudflare’s APO since they offer different types of caching (cache plugins store HTML on your server while Cloudflare stores HTML on their edge servers). So keep it enabled!
According to Brian Li:
“Cloudflare APO is not a replacement for page caching on the origin server… since Cloudflare APO works on a layer above and external to the origin server, it’s still important to maximize origin server performance with local page caching.
When APO is enabled, Cloudflare still has to make requests to your origin server in order to fill the Cloudflare Workers KV database or edge cache with your site’s HTML pages. Since page caching speeds up requests and reduces CPU and RAM load on the origin server, it’s important to keep page caching enabled.”
4. Confirm DNS Records
The first step is to update DNS records which should have already been done if you set up Cloudflare. If you haven’t, sign up for Cloudflare, add your website, and they will scan DNS records. Click “continue” and Cloudflare will prompt you to change nameservers (next step). I recommend this method (as opposed to setting up Cloudflare through your hosting account) since this gives you full access to Cloudflare’s dashboard which has extra features like the APO.

5. Change Nameservers
After Cloudflare scans DNS records, they will assign you 2 nameservers.
Login to your domain registrar (i.e. NameCheap, GoDaddy, etc) and find the area to change nameservers which will be in the DNS settings. You’ll want to use custom nameservers and replace the default nameservers with Cloudflare’s. Once done, click “done, check nameservers.”


6. Activate Cloudflare’s CDN
Traffic needs to be proxied through Cloudflare for APO to work.
Go to your Cloudflare DNS settings and change your website from DNS Only to “Proxied.”

7. Purchase APO ($5/Month)
Login to your Cloudflare account and go to Speed → Optimization → Automatic Platform Optimization for WordPress. Purchase APO which costs $5/month or free on Cloudflare’s Pro plans. Once you buy it, you’ll see a note that says “The WordPress plugin was not detected on yourwebsite.com.” You’ll need to install the Cloudflare plugin then click “Check again” to fix it.

8. Install The Cloudflare WordPress Plugin
Install the Cloudflare plugin.
If you look at the plugin reviews, the recent ones are mostly decent. I think Cloudflare started taking it’s plugin (a little) more seriously and has been working on better compatibility and squashing bugs. It has always worked perfectly for me but even as of writing this, it’s untested with the latest WP version and hasn’t been updated for 4 months. Damnit Cloudflare, get on it!

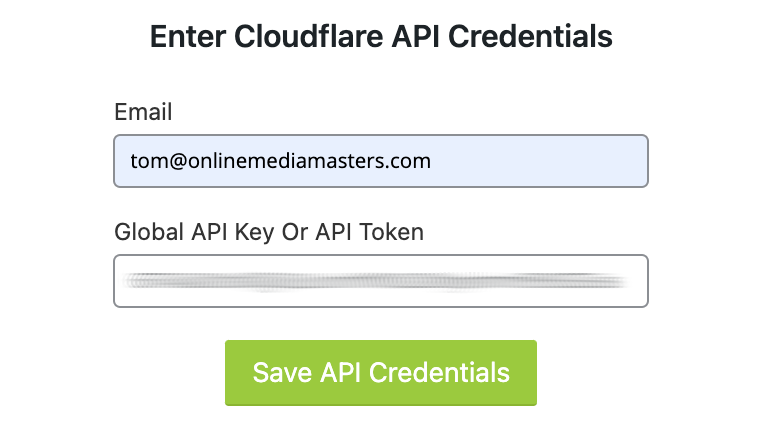
9. Create An API Token And Add It To The Plugin
Next, we’ll create an API token.
In your Cloudflare account, head to My Profile → API Tokens → Create Token. Click “Use template” for the WordPress option, then leave everything as-is (unless you want to make changes), then click “continue to summary.” Cloudflare will provide you with an API token.

Go to your Cloudflare plugin settings where you’ll enter your Cloudflare email + API token.
Make sure APO is turned on:

10. Purge Cache In Your Cache Plugin, Then Cloudflare
Now that APO is activated, purge cache in your cache plugin first, then purge cache in the Cloudflare plugin. It should only take a minute or two, then you can confirm APO is working.

11. Confirm APO Is Working
Visit uptrends.com, enter your domain name as https://www. and you should see the following: CF-Cache-Status: HIT, cf-apo-via: tcache, cf-edge-cache: cache, platform=wordpress. If you don’t, try publishing any change on your site and retesting it, or wait a couple of minutes.

12. APO vs. Cache Everything Page Rule
The main difference between Cloudflare APO and the popular cache everything page rule (or the WP Super Cloudflare Page Cache plugin) is APO’s purging and use of Workers KV storage.
Cloudflare (in the interview on Freelancer Tools) says:
- The main one is that when APO is enabled, the Cloudflare plugin will automatically trigger a cache purge for the subset of the pages that were modified (including categories and tags).
- When using cache everything, customers need to purge the cache manually which is much less specific and can purge pages from the cache that never changed.
- Secondly, APO uses 2 caching mechanisms: Cache and Workers KV Storage.
- Using KV storage in APO we increased cache hit ratio by 30%.
- Lastly APO uses smart caching, so it will bypass the cache if it detects WordPress specific cookies or query parameters (excluding those commonly related to attribution / marketing like UTMs).
- Additionally, KV purges publish instantly across the global edge while cache everything purges propagate a bit more slowly
Brian Li (from Kinsta) says:
“Contrary to the popular belief that WP Cloudflare Super Page Cache is the same as, or better than, Cloudflare APO, I actually believe that APO is definitively superior – at least from a page caching standpoint. Unlike Cloudflare APO, using a cache everything page rule doesn’t provide you with a global replication layer that automatically copies HTML to data centers around the world. With a “cache everything” page rule configured, a request to your site from Tokyo will only result in a page being cached in Tokyo. With APO, a request to your site from Tokyo will trigger Cloudflare to store the HTML page in Workers KV, which automatically replicates across Cloudflare’s global network within 60 seconds. To put it simply, APO effectively decentralizes your site’s origin by mirroring your site across Cloudflare’s global edge network.”
Kinsta says:
Previously, the most popular “full page caching” method involved creating a Cloudflare page rule to “cache everything”. While this method could result in significant performance gains, it wasn’t a very efficient method of caching because it relied on a “pull” model instead of Workers KV’s “push” model which automatically pushes HTML globally.
Saumya Majumder (from WP Super Cloudflare Page Cache) also makes his case here.
Wrapping It Up
Do I recommend Cloudflare APO? Sure, with how easy it is to set up on WordPress, it’s at least worth it a shot. Or maybe you don’t need it and are using Workers instead, or maybe the cache everything rule is sufficient so you can save $5/mo. The only way to know is trying it yourself.
Here’s Cloudflare’s tutorial in case you got lost:
Cheers,
Tom


