PageSpeed Insights wants you to serve static assets with a cache policy of 31536000 seconds (equivalent to 1 year).
The first step is to learn which files need to be fixed which you can see in PSI or a browser caching checker. If the files are served by a third-party domain like Google Analytics or Tag Manager, you should host them locally (so you can control the cache policy) or delay them. Perfmatters, Flying Scripts, and some cache plugins can host files locally and delay JavaScript.
If files are already hosted locally but you still get errors, you’ll need to find settings in your hosting account or .htaccess to edit cache expirations. Do a Google search for “static cache expiration [your host]” to look for instructions (for example, see instructions for Cloudways and Kinsta). Some hosts will require you to change the cache expiration by editing .htaccess.
CDNs and some cache plugins do this too. Cloudflare has a setting to increase browser cache TTL to 1 year. LiteSpeed Cache and W3 Total Cache have a setting to change the browser cache TTL. Otherwise, you’ll need to change it in your server settings or .htaccess to fix this item in PSI. If everything else fails, contact your host since cache expirations are usually set at a server level.
No content
- Learn which files need longer cache expirations
- Increase browser cache TTL in Cloudflare
- Increase browser cache TTL in WP Rocket
- Increase browser cache TTL in other cache plugins
- Search “static cache expiration instructions” for your host
- Delay third-party code
- Host fonts/analytics locally (so you can control them)
- Disable Cloudflare email obfuscation + Rocket Loader
- Purge files and retest your site
No content
1. Learn Which Files Need Longer Cache Expirations
Browser caching checker shows a list of assets with their expiration time.
You can immediately see whether short cache expiration times are caused by assets served from your domain, your CDN, or third-party domains like Google Fonts and Google Analytics.

2. Increase Browser Cache TTL In Cloudflare
Assuming you’re using Cloudflare’s CDN by activating the orange cloud to proxy traffic, you can set browser cache TTL to “1 year” in the Cloudflare dashboard under Caching → Configuration.

Other CDNs usually have a similar option. For example, BunnyCDN can change browser cache expiration time to 1 year under Pullzone → Your Website → Cache → Browser Cache Expiration.
3. Increase Browser Cache TTL In WP Rocket
WP Rocket doesn’t have a browser cache TTL setting. Instead, they add cache expirations to your .htaccess file automatically, which looks like this:
# Expires headers (for better cache control)

ExpiresActive on
    ExpiresDefault                              "access plus 1 month"
    # cache.appcache needs re-requests in FF 3.6 (~Introducing HTML5)
    ExpiresByType text/cache-manifest           "access plus 0 seconds"
    # Your document html
    ExpiresByType text/html                     "access plus 0 seconds"
    # Data
    ExpiresByType text/xml                      "access plus 0 seconds"
    ExpiresByType application/xml               "access plus 0 seconds"
    ExpiresByType application/json              "access plus 0 seconds"
    # Feed
    ExpiresByType application/rss+xml           "access plus 1 hour"
    ExpiresByType application/atom+xml          "access plus 1 hour"
    # Favicon (cannot be renamed)
    ExpiresByType image/x-icon                  "access plus 1 week"
    # Media: images, video, audio
    ExpiresByType image/gif                     "access plus 4 months"
    ExpiresByType image/png                     "access plus 4 months"
    ExpiresByType image/jpeg                    "access plus 4 months"
    ExpiresByType image/webp                    "access plus 4 months"
    ExpiresByType video/ogg                     "access plus 4 months"
    ExpiresByType audio/ogg                     "access plus 4 months"
    ExpiresByType video/mp4                     "access plus 4 months"
    ExpiresByType video/webm                    "access plus 4 months"
    # HTC files  (css3pie)
    ExpiresByType text/x-component              "access plus 1 month"
    # Webfonts
    ExpiresByType font/ttf    "access plus 4 months"
    ExpiresByType font/otf    "access plus 4 months"
    ExpiresByType font/woff   "access plus 4 months"
    ExpiresByType font/woff2  "access plus 4 months"
    ExpiresByType image/svg+xml                 "access plus 1 month"
    ExpiresByType application/vnd.ms-fontobject "access plus 1 month"
    # CSS and JavaScript
    ExpiresByType text/css                      "access plus 1 year"
    ExpiresByType application/javascript        "access plus 1 year"
The problem is that even when you change the expiration values to 1 year, WP Rocket automatically regenerates the .htaccess file once you save changes. Which means, it won’t save.
You can try adding custom rules to your .htaccess file or WP Rocket also recommends checking with your host to make sure they don’t block WP Rocket rules and that Mod_expires is enabled.
If you don’t know how to edit .htaccess, use the Htaccess File Editor plugin.

4. Increase Browser Cache TTL In Other Cache Plugins
LiteSpeed Cache and W3 Total Cache let you change browser cache TTL in the settings. You’ll see it in LiteSpeed Cache in Cache → Browser → Browser Cache TTL. In W3 Total Cache, it’s found in Browser Cache → Expires Header Lifetime (do this for CSS, JS, fonts, and media files).


5. Search “Static Cache Expiration Instructions” For Your Host
This step is important because the cache expiration in your server usually overrides that of CDNs. (i.e. Cloudflare’s browser cache TTL respects those in your server unless they’re higher).
Instructions
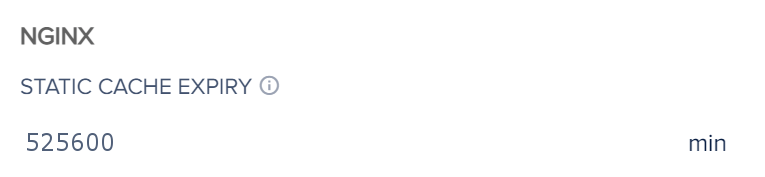
Follow KeyCDN’s tutorial when using Apache or Nginx which explains why you need both cache-control and expires headers, and how to add them to Apache (.htaccess) or Nginx (server block).
Nginx Cache-Control Headers
location ~* \.(png|jpg|jpeg|gif)$ {
    expires 365d;
    add_header Cache-Control "public, no-transform";
}

location ~* \.(js|css|pdf|html|swf)$ {
    expires 30d;
    add_header Cache-Control "public, no-transform";
}
Nginx Expires Headers
location ~* \.(jpg|jpeg|gif|png)$ {
    expires 365d;
}

location ~* \.(pdf|css|html|js|swf)$ {
    expires 30d;
}
Apache Cache-Control Headers
<filesMatch ".(ico|pdf|flv|jpg|jpeg|png|gif|js|css|swf)$">
    Header set Cache-Control "max-age=2592000, public"
Apache Expires Headers
## EXPIRES CACHING ##

    ExpiresActive On
    ExpiresByType image/jpg "access 1 year"
    ExpiresByType image/jpeg "access 1 year"
    ExpiresByType image/gif "access 1 year"
    ExpiresByType image/png "access 1 year"
    ExpiresByType text/css "access 1 month"
    ExpiresByType text/html "access 1 month"
    ExpiresByType application/pdf "access 1 month"
    ExpiresByType text/x-javascript "access 1 month"
    ExpiresByType application/x-shockwave-flash "access 1 month"
    ExpiresByType image/x-icon "access 1 year"
    ExpiresDefault "access 1 month"

## EXPIRES CACHING ##
6. Delay Third-Party Code
Delaying JavaScript can fix cache policy errors caused by third-party code.
If your PageSpeed or Browser Caching Checker report includes external domains (Google Analytics, Tag Manager, FB Pixel, etc), delaying JavaScript will improve core web vital scores.
While WP Rocket and LiteSpeed Cache do this automatically, you have to manually do it in Perfmatters, FlyingPress, and Flying Scripts (free). Check their documentation or see this list of common JavaScript files to delay. You can also try delaying plugins loading below the viewport.

Common JavaScript Files To Delay
ga( '
ga('
google-analytics.com/analytics.js
analytics.js
gtagv4.js
analytics-minimal.js
/gtm.js
/gtag/js
gtag(
/gtm-
adsbygoogle.js
grecaptcha.execute
fbevents.js
fbq(
/busting/facebook-tracking/
wp-content/plugins/plugin-name
7. Host Fonts/Analytics Locally (So You Can Control Them)
Google Fonts and Google Analytics create external requests to third-party domains like fonts.gstatic.com and www.google-analytics.com. Hosting each of these locally is faster because not only does it prevent external requests, but you can control their cache expiration.

Perfmatters has settings to host fonts and analytics locally. It even has settings to reduce the size of your Google Analytics tracking code by using a smaller a script type (like analytics-minimal.js) and disabling remarketing features to prevent a second request to Doubleclick.
Some cache plugins also do it (WP Rocket hosts analytics locally but not fonts… FlyingPress hosts fonts locally but not analytics). There are also free plugins like OMGF and Flying Analytics.

8. Disable Cloudflare Email Obfuscation + Rocket Loader
Email Obfuscation adds a small piece of JavaScript (email-decode.min.js) as well as Rocket Loader (rocket-loader.min.js). Since they’re loaded from external domains, you might get errors.
I don’t recommend Rocket Loader since it’s notorious for breaking sites, and there are other ways to hide your email than using Rocket Loader, so disable them in your Cloudflare settings.

9. Purge Files And Retest Your Site
Once you’re done changing the cache expiration, purge files and retest your site. Remember that Lighthouse can take 28 days to update, so you may want to try SpeedVitals or GTmetrix.

How do I serve static assets with an efficient cache policy in WordPress?
Change browser cache expiration to 1 year (31536000 seconds). This is typically done in your hosting account, cache plugin, or CDN settings, or by editing these values in your .htaccess file. Hosting fonts/analytics locally and delaying third-party code can also help.
How do I serve static assets with an efficient cache policy in WP Rocket?
Since WP Rocket adds cache expirations to .htaccess (but regenerates it when you save settings), errors for serving static assets with an efficient cache policy are common. You might have better luck changing the cache expirations in your hosting and CDN settings.
How do I serve static assets with an efficient cache policy in Cloudflare?
Login to your Cloudflare dashboard and go to Caching → Configuration → Browser Cache TTL where you'll change it to 1 year.
Cheers,
Tom